First you need to pick out flannel at your favorite fabric store. I chose a flowery one for the little girls and a blue and gray polka dot for the little boy. I wanted to make my receiving blanket square so I purchase 1 1/4 yards of fabric.
This blanket was made with a sewing machine. If you do not have one I'm sure sewing a simple edge around the blanket would work, otherwise if you have one you can use the blanket stitch (if your sewing machine has that option) or since mine did not change it to a zig zag stitch.
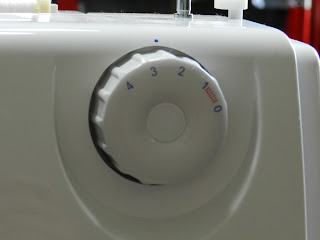
Set up your sewing machine with the appropriate settings for thread tension and stictch. For instance, my thread tension needed to be 3 1/2 for a zig-zag stitch.
 |
| thread tension |
 |
| selected stitch |
Once your machine is set up, cut the "factory edge" around your fabric off. Discard. Place the right side of your fabric under the presser foot.Zig-zag around your fabric, keeping the presser foot close to the edge (this will be helpful later on).
 |
| factory edge |
Zig-zag completely around the fabric, watching the edge for closeness. After the zig-zag stictch is complete back stictch a few inches and cut off strings.
There you have the start to your receiving blanket!
It was fun to get back on the sewing machine. Even though it has been awhile since I have been on the sewing machine, it was like riding a bike. I was able to get the sewing machine all set up and ready to go with no trouble. I hope you have fun starting this project as I did. Good luck!
 |
| Example of the zig-zag stictch |


No comments:
Post a Comment